Read on and see how I made a kick-ass computer all by myself!!! |
|
Ingredients:
I bought all of these things through NewEgg.com, which was an amazing place to buy from. I had initially looked up prices through Pricewatch.com, and found good prices with a company called BZBoyz.com. I kept holding off on buying stuff because I wasn't sure that I wanted to go through with buying nearly $1K worth of stuff for a new PC. Then on an instinct, I searched groups.google.com for anything about BZBoyz.com. YIKES. Lots of unhappy folks, and a reference to ResellerRatings.com was another information tool. There, you can find info on all the online resellers, and about BZBoyz.com, there were tons of bad reviews. Yet there were those who praised Newegg.com, who I had seen an ad for in PC Gamer. So I went there! And wow, the stuff was priced cheaper and the items got to me within days. And that was on the default shipping method, which is already FedEx. Nice! So putting a computer together isn't exactly the easiest thing, so I consulted a few sources. I had saved a PC Gamer that had a pictorial instructional guide on putting a computer together, which was extremely helpful. Unfortunately, it wasn't completely thorough, as it had to be generic enough for any computer. So I also had to rely on the motherboard manual, which was surprisingly more helpful than stereo instructions. But anyways, here's Hobie's journey on building his first PC from scratch. There are some fun pictures below - I am particularly entertained by some of my self shots. :-) |
|
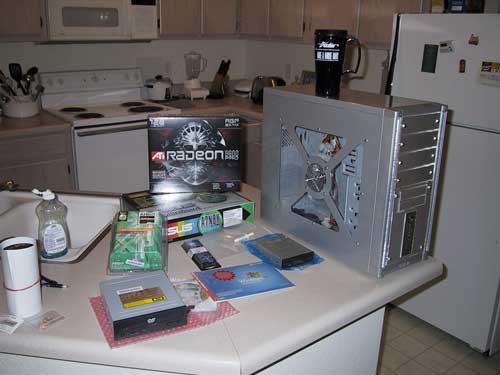 |
Here are all my components (I forgot to put the hard drive in the picture) all nice and in their boxes and ready to go. Needless to say, I was a tad nervous about actually putting it all together. I was REALLY really hoping none of my parts were defective. So on Sunday night, I plunged into the task of putting the pieces together, starting with the motherboard components. |
 |
So the ASUS motherboard box exploded on my counter.
It was at this point where I started to have to make 'command' decisions,
as the PC Gamer guide says to put the motherboard in the case first,
while the motherboard guide says to install memory and the CPU (including
the heatsink, fan) first before putting it in the case. I went with
the latter advice, as I know that once the mobo was in the case,
it would be harder to work with.
|
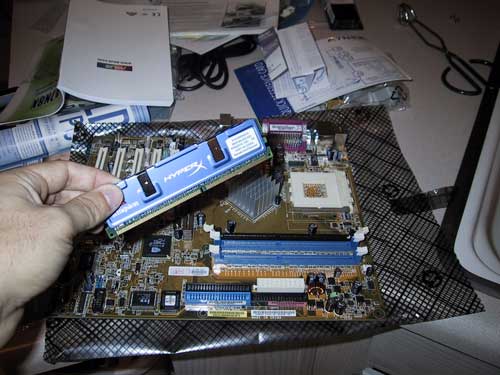 |
Step #1 with the mobo. Putting in the memory. I cut open my memory plastic case, dunked the module in the Palmolive dishwashing liquid to make sure the memory was clean, and then used the hairdryer on it to make sure the memory was dry. You NEVER want to put wet memory in a mobo. ;-) Anyways, the memory was all ready to go, and I just had to figure out which memory slot to plug the memory into. Slot 1! Go figure. |
 |
And the memory is in place. Whew! I had to take a break after doing that. That's tough work! It is definitely important to remember that memory stick has to be snapped firmly in place, or else you may not have a solid connection. And Hobie needed his 512MB of memory like a fat kid needs cake. |
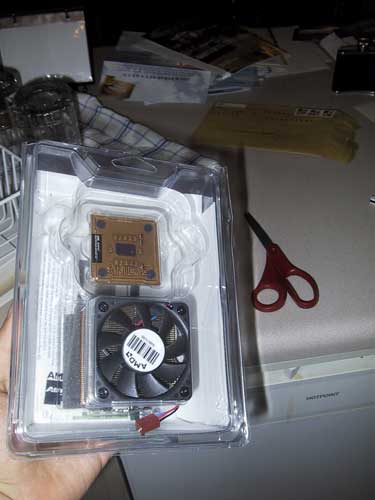 |
What you see here is the most important and expensive ingredient of my PC project. This baby cost right around $325, but it was worth going 'retail-version' on this, as it comes with a fan and a heatsink, which are VERY critical to ensuring your box doesn't blow up. I know, some people like that, but I'm not one of them. |
 |
Ah, direct contact with the chip. Well, direct contact with the plastic thing that holds the chip. But I did touch the chip right after this picture was taken. So when you get to this point, it's important to have unlocked the chip socket. When it's time to place the chip, there's a clear alignment that must occur, whether it be with arrows or whatever. But when it is aligned right, the chip falls nicely and easily into place without having to push it in with force. Remember this. This is the expensive part, and I wasn't willing to shell out another $325 just because I got a little push-happy. |
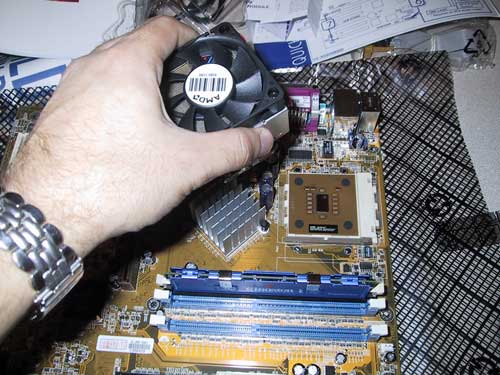 |
Now this was where it got a tad tricky. This fan/heatsink assembly obviously has to be snug (meaning - tight as hell) against the chip, but that means it takes a little bit of push-happiness to make it attach to the chip. All the warnings kept saying 'Don't Push on the Chip!', but that's kind of impossible.... But whatever. First, find the alignment so that the assembly rests flush on the chip and not at an angle, etc. Then the clip from hell needs to be attached. So find the side that doesn't have a handy-dandy notch in it for a tool, and get that side attached to the three teeth. Once that is done, firmly but gently (whatever that means), get the other side out, down and then in to attach to the other side. Once that's on, that puppy ain't going nowhere, and your chip has cooling action. Oh yeah! Once I got that done, I was very relieved. |
 |
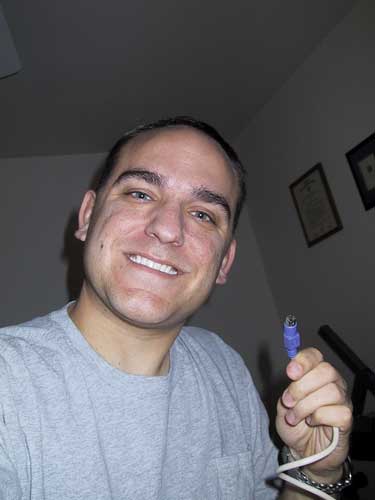
Not going anywhere, and it's plugged in, which is oh-so-important. The fan doesn't turn on good will. |
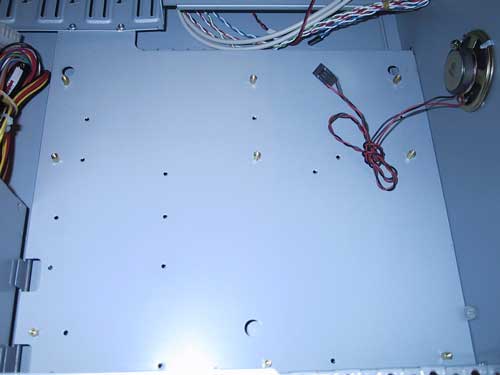 |
Now is the time to put the mobo in the case. I'm glad I put the memory and chip assembly on when the mobo was where I could get to it freely as opposed to trying to do that when the mobo was in the case. But now it was time. So as you can see in the pictures, I've got the mounting screws positioned where the mobo has it's mounting holes (sounds so sexual, doesn't it?). |
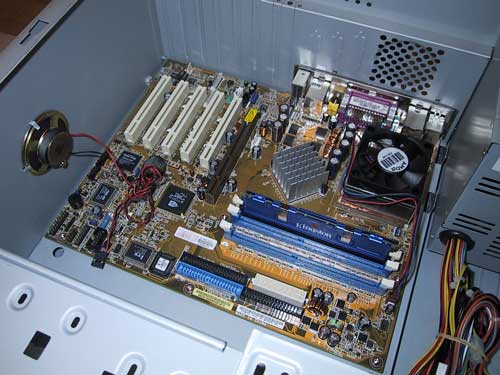 |
And voila, the motherboard is in. Now for the connecting of drives and cables and power and tigers and bears, oh my! |
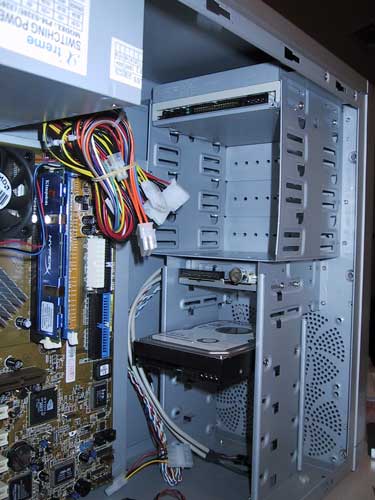 |
So for my PC, I needed to put in a DVD-ROM drive (I don't need burning capability just yet - my laptop and old PC have that), a floppy drive (hardly ever used except when you're installing a hard drive or OS), and the hard drive, whcih is down in the bottom section there. It looks like I have space for around 4 hard drives. SWEET. Apparently my mobo also can do RAID, so when I one day get another hard drive, I can run RAID style. Whatever that means... |
 |
Well, this is the stage where you need to have your mobo manual handy and propped open to the schematic diagrams. Lots of case connectors need to be attached to the motherboard, as do the drives with assorted IDE cables, SATA cables, and the power cables as well. Follow the manuals and eventually it'll all be connected. Also, by this point, I've plugged in the video card into the AGP slot. |
 |
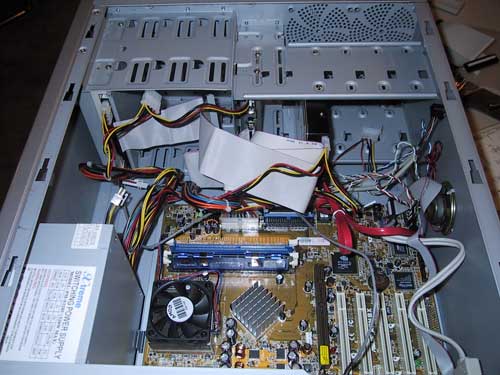
And after that, I was done for that Sunday. I needed to sleep, and I didn't want to get into the next phase, which is turning this beast on and hoping it doesn't melt down. |
Turning the thing on for the first time and making it a PCSo, once I was home from work on Monday, it was time to tackle the next part of the process, that is the initialization of the hard drives and installing the OS. Oh yeah, and also hoping that when I turned on the power for the first time, the PC would actually turn on. Continue on below to see how I fared.
|
|
 |
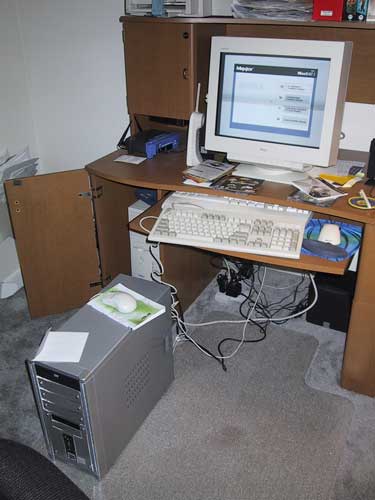
So here is my computer station. I didn't buy another monitor, keyboard, or mouse for this new PC, so I had to connect these peripherals to the new box. Well, as you can see by the picture, when I turned it on and pressed 'DEL', I got to the BIOS. Yay!!! I wanted to make sure the BIOS settings were all good, and after a few small changes, I was ready to move to the next step, which was initializing my new hard drive. |
 |
Yeah, it didn't go that smoothly. When I put the installation CD from Maxtor in that would allow me to boot off of it and then initialize the hard drive, well, it would get to the initial screen to choose the language I wanted to work in, but my keyboard and mouse weren't being recognized. Some back info: I have a USB keyboard and a USB mouse. I had read on Sunday some stuff that made me think I better have a PS2 style of both the keyboard and mouse just in case, and I was going to borrow one of each from work, but in my excitement to get home, I forgot. What a dumb shit. I really wanted to work on this though, and I tried to forget the hard drive installation routine, and just boot off of the Windows XP Pro installation CD. Well, Windows couldn't see my advanced HD (the whole Serial ATA thing wasn't being understood), so I was like, Dammit!!! My only real option - go to work and get the keyboard and mouse. So that's what I did. It was 7pm by this time, so traffic wasn't that bad at all. My drive took about 40 minutes there and back, and by 7:45pm, I was back at it. |
 |
Ah, the joy of PS2. |
 |
I got the PS2 devices, and when I restarted with the Maxtor CD, everything came right up. So there's a lesson to be learned there - it's always a good idea to have the basic PS2 style of keyboard around when building a PC. |
 |
Yet I still wasn't on the path to XP installation. Setup would only get so far until it looked for a hard drive. Maxtor had provided a utility to make a floppy driver disk, and I did that, but the drivers were for a PCI card that runs Serial ATA devices. My mobo does it directly, so then I finally had the thought, "Hey, I bet my mobo driver disc has something for this...." and I was right! Sure enough, there were drivers on the CD, which I copied to a floppy. So here's another thing I learned - it's REALLY handy to have a fully working PC available when building a PC from scratch so you can read CDs, surf the Internet for help, etc. Just something to think about. |
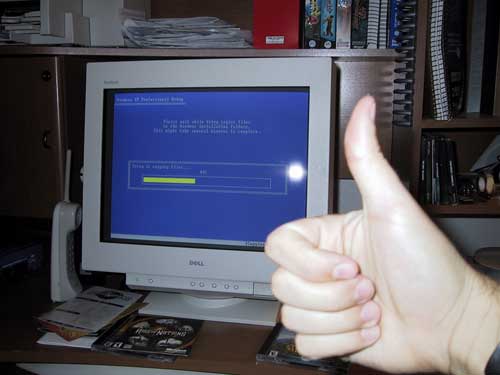 |
Once I got the correct driver, Windows XP setup started just beautifully. |
 |
Hey, I'm not going to tell you my Windows XP Pro installation code. HA! Just try to blow that up. The resolution will kill you. |
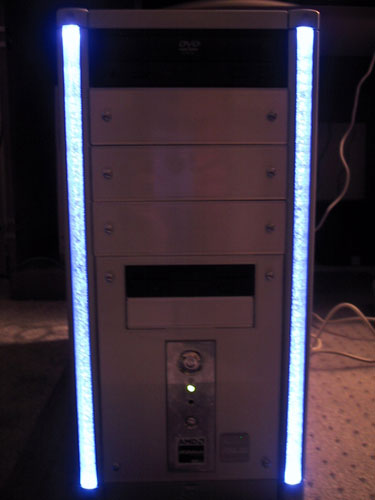 |
After that, it's all driver installation and making sure you get rid of all the little yellow exclamation marks in the Device Driver section of the Control Panel. My motherboard took care of a lot of the yellow marks, as I have quite a few integrated devices on my mobo (if you noticed above, I didn't buy an audio card - the audio processor on board the mobo is very advanced). Also had to install the video card drivers, and after downloading tons of updates from windowsupdate.com, I was ready to rock. Unfortunately, my Linksys Wireless router and switch went toes up shortly thereafter. So I'm returning that to Linksys for an exchange tomorrow. Sigh. At least I'll be on vacation while all the processing occurs. If you can't tell by the picture to the left, my case actually has two glowing tubes on the front - it's a cool deep blue. I think it was when I poured in the dish soap. |
The End of the RoadI totally enjoyed building a PC from scratch. It was way cheaper doing it this way than to buy one premade through Dell or Gateway. I was really shocked at how great an experience I had through Newegg.com. I highly recommend using them if you are considering buying any computer components or for that matter, any electronic component. They sell lots of stuff. If you ever want any advice from me, or more details about the stuff I bought, let me know. As for the differences I've noticed in the day this rig has been operational, I'm blown away by how much faster SimCity 4 runs. You can zoom in and out while playing, and when playing on my P3 600MHz system, that operation would take minutes. Now, I can zoom in and out and there's not even a delay. It was ALL worth it. <sigh> |
|